Keyboard Maestro macro to toggle macOS calendar visibility
As a pianist, I use Calendar on macOS and iOS to plan each day’s practice. On heavy days I may have over a dozen practice blocks, so the calendar gets crowded quickly and it becomes easy to miss non-practice events. A calendar that looks like this makes the problem obvious:
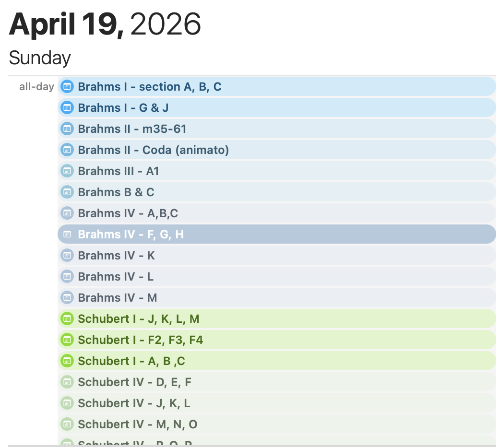
What I really wanted was a quick way to toggle a group of calendars at once on macOS. In my case, that group is the set of works I am currently practicing (for example, specific Brahms and Schubert calendars). Your grouping might be completely different, depending on your purpose, but the same approach applies.
Since I am an avid user of Keyboard Maestro, this was my go-to choice to automate it. While Keyboard Maestro macros can contain actions to launch AppleScripts, unfortunately macOS Calendar.app does not have an AppleScript API to toggle calendar visibility. In the AppleScript world this always means that we have to roll out the powerful, but fragile tool of UI scripting. It’s fragile because as Apple or third-party developers change the UI layout, our script is almost guaranteed to break. But in this case, it’s the only way.
Finding the right element to target takes a bit of detective work. The process is made a lot easier with a tool called UI Browser which unwraps the UI hierarchy in AppleScript syntax. Setting the AppleScript target to Calendar.app, we can click through elements progressively, highlighting them along the way until we find exactly the one we want to work with. In this case, the search led to this checkbox:
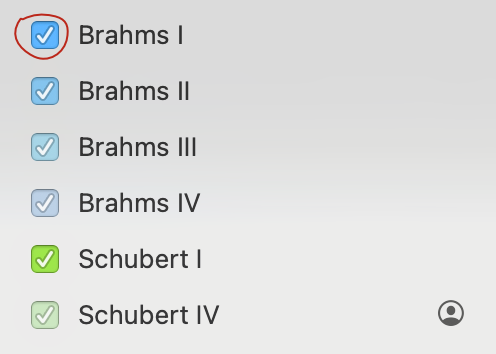
This checkbox has an AppleScript reference of checkbox 1 of UI element 1 of row 10 of outline 1 of scroll area 1 of splitter group 1 of splitter group 1 of window "Calendar". This is what we have to click to toggle visibility. The same row contains a text field that we examine to see whether it contains the name of a calendar we want to toggle. From there, it’s just a matter of putting that into a Keyboard Maestro Execute AppleScript action. The script itself is:
--
--   Created by: Alan Duncan
--   Created on: 2026-04-20
--
--   Copyright © 2026 ojisanseiuchi.com, All Rights Reserved
--

use AppleScript version "2.4" -- Yosemite (10.10) or later
use scripting additions

set calendarsToToggle to {"Brahms I", "Brahms II", "Brahms III", ¬
   "Brahms IV", "Schubert I", "Schubert IV"}

tell application "Calendar" to activate

tell application "System Events"
   tell process "Calendar"
      -- Using path confirmed by UI Browser
      set splitterGroup to splitter group 1 of splitter group 1 of window "Calendar"
      set sidebarOutline to outline 1 of scroll area 1 of splitterGroup
      set allRows to rows of sidebarOutline

      repeat with aRow in allRows
         try
            -- The container where all the calendars live
            set rowContainer to UI element 1 of aRow

            -- Pull the name from the text field
            set rowName to value of text field 1 of rowContainer

            -- Check for a match and click the checkbox in that same container
            if calendarsToToggle contains rowName then
               click checkbox 1 of rowContainer
            end if
         end try
      end repeat
   end tell
end tell
In Keyboard Maestro I assigned a hot-key trigger of ^P _(P for “Practice”) and scoped it to Calendar.app so that I can quickly show or hide this practice-calendar group.
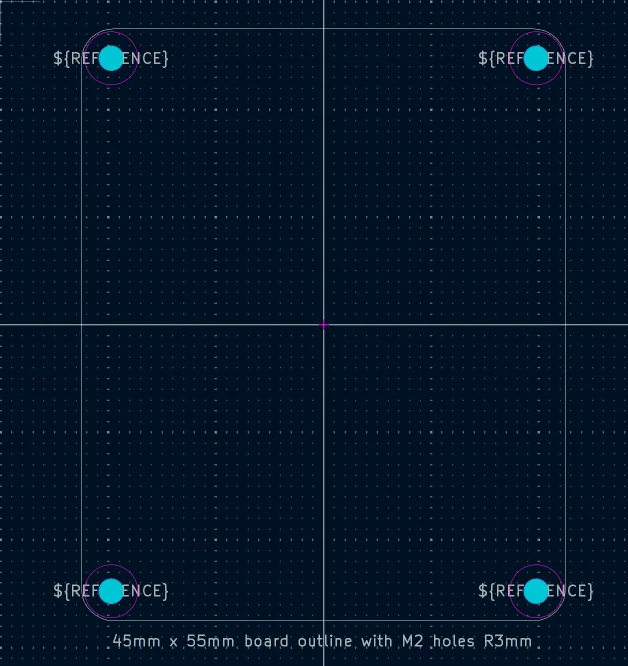 PCB fabricators require a board outline on the `Edge.Cuts` layer to specify the board size and shape. While drawing the board outline in the PCB editor is straightforward and uses the standard line and shape drawing tools, it is convenient to retain standardized board outlines and related parts, such as fasteners, as reusable footprints. During the board layout process, you can simply plop a board outline, along with perfectly-placed mounting holes into the editor and you can concentrate on placing components and routing. Also, having a standard library of board outlines gives you a predictable set of size choices for enclosures and for ordering SMD stencils.
 Facebook and Reddit are blocking access to a site that unmasks otherwise anonymous ICE thugs. F*ck you Reddit and Facebook.